
It goes by several names in Polish: zalewajka, plujka, parzucha (roughly, “dishwater”, “spit brew”, “sludge coffee”), and it gets just as many disapproving looks in specialty coffee shops. And yet half of Poland still drinks it, every day, with no plans to stop.
The good news: you can improve this method without buying anything. Four things matter: grind size, water temperature, ratio and time. Below you will find a recipe in grams, a ratio table, and answers to the questions people type into Google most often. At the end, I will explain the one downside of this method that rarely gets mentioned.
Polish-style coffee: what it actually is
It is the simplest brewing method there is. You tip ground coffee into a glass or a mug, pour hot water over it, and wait for the grounds to settle. No filter, no equipment, no separating the grounds from the brew.
The technical name is full immersion without grounds separation. The coffee stays in contact with the water the whole time you are drinking it, so the brew keeps changing. The first sip tastes different from the last.
Its closest relative is cupping, the way professionals evaluate coffee: ground coffee, hot water, no filter, and a spoon to break the crust on top. Turkish coffee and Scandinavian boiled coffee are close cousins too, though there the brew usually gets boiled or poured off the grounds. There is just one difference: nobody is embarrassed by those methods.
And they should not be. Made with good beans and a few small fixes, Polish-style coffee can be genuinely good. It is a different story when you pour boiling water over finely ground supermarket coffee a month after opening the bag. Then the complaints about “plujka” are entirely fair.

How to brew ground coffee in a glass: step-by-step recipe
This is how I brew it when all I have to hand is a kettle.
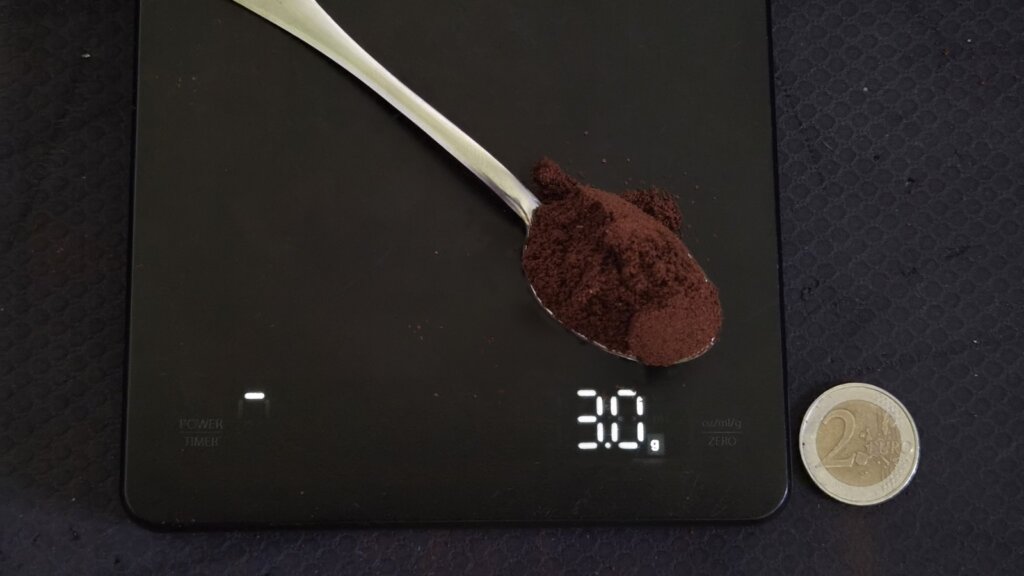
- 1. Measure the coffee. 15 g for a 250 ml mug. Without scales, that is about 5 heaped teaspoons. Yes, five: a heaped teaspoon of coffee only weighs around 3 g.
- 2. Boil the water and let it stand for about 2 minutes. You are aiming for 90-95°C.
- 3. Pour a splash of water over the coffee and wait 30 seconds. This step is optional, but with fresh coffee it is quite a sight. More on that below.
- 4. Add the rest of the water. Pour slowly so you do not churn the grounds up to the top.
- 5. Wait 4 minutes, then stir once. One stir, not ten.
- 6. Skim the foam and grounds off the top with a spoon. This is the step most people skip, and it makes the biggest difference.
- 7. Let it cool slightly before drinking. Coffee made this way tastes best a little on the cooler side.
The whole thing takes under 6 minutes, 5 of which is just waiting. Everything you need is already in your kitchen.
How much coffee per glass: ratios in grams and teaspoons
The most common mistake is eyeballing it, usually on the light side. Start with a ratio of 1 g of coffee to 16-17 ml of water. Below is the conversion for typical vessels.
| Vessel | Water | Coffee | Heaped teaspoons |
|---|---|---|---|
| Small glass | 150 ml | 9 g | about 3 |
| Standard glass | 200 ml | 12 g | about 4 |
| Mug | 250 ml | 15 g | about 5 |
| Large mug | 350 ml | 21 g | about 7 |
Treat the teaspoon column as a rough guide only. A gram measures mass, a teaspoon measures volume. I checked this on scales myself, because there is a lot of nonsense about it online. A heaped teaspoon of finely ground coffee weighs about 3 g, a level one around 1.5 g. Kitchen conversion tables usually quote a round 5 g for coffee, but that figure is really borrowed from sugar, which is much denser. Ground coffee is light and airy. A coarser grind, which is exactly what you want for a glass, weighs even less per teaspoon, because larger particles pack together worse and leave more air between them. That is why a 250 ml mug takes around five heaped teaspoons, or six with a really coarse grind. Dark roast coffee also weighs less than light roast, because it is less dense.
Your best bet is to weigh the coffee accurately once on kitchen scales, then remember what that amount looks like in your own teaspoon. One minute of effort, years of peace of mind.
If the coffee comes out too weak, add 2 g more rather than brewing it for longer. Extra contact time only increases extraction slightly, but it makes it much easier to pull out bitterness.
Should you pour boiling water over ground coffee?
Better not to, though it is not a fatal mistake.
Higher temperatures speed up extraction. In methods where the water is only in contact with the coffee briefly, that is not much of a problem. In a glass, the coffee sits in the water for several minutes, so the temperature keeps working the whole time. With a fine grind and a darker roast, boiling water easily tips the brew towards bitterness. With a light roast and a coarser grind, though, it can work well.
A safe starting point: boil the water and wait about 2 minutes. In a typical kettle, the temperature will drop to around 90-95°C by then. That depends on how much water you are boiling, the kettle itself, and the temperature of your kitchen. If you have a kettle with temperature control, set it to 93°C and forget about it.
The other issue is water quality. The SCA recommends brewing water with 75-250 mg of minerals per litre, with a target of around 150. In practice, filtered water or low-mineral bottled water both work well. Very hard tap water flattens the flavour and leaves scale in your kettle.
How long to brew ground coffee
About 4 minutes from pouring. Then stir once and skim off whatever is floating on top.
Holding it for longer does not gain you much. Extraction keeps rising, but more and more slowly, while the risk of bitterness does not drop at all. In the later stages, you start pulling out compounds you do not want in your cup. Adjust strength with the dose, not the time.
There is one catch this method has that others do not: the grounds stay in the vessel and keep working. Extraction slows down as the brew cools and gets closer to equilibrium, but it never quite stops. With the last few sips, you also stir up sediment from the bottom. That is why the end of the mug is often heavier and more astringent than the start, and coffee left on your desk for an hour has practically turned into a different drink.
The takeaway is simple: brew only as much as you will drink within about fifteen minutes. Polish-style coffee does not like being left to sit.
Grind size: why supermarket coffee turns out bitter
For this method, choose a medium-coarse grind, roughly what you would use for a pour-over. It does not need to be as coarse as for a Chemex. The rule of “the longer the contact, the coarser the grind” is a useful guideline, not a law of nature. With full immersion, a finer grind will work fine too, as long as you shorten the brew time to match.
Pre-ground supermarket coffee is often ground fine, for filter coffee machines and moka pots. In a glass, that grind gives up its flavour faster than a four-minute contact time calls for. That makes bitterness and extra sediment more likely, which is where the flat, burnt taste comes from that a lot of people assume is just part of how Polish-style coffee tastes.
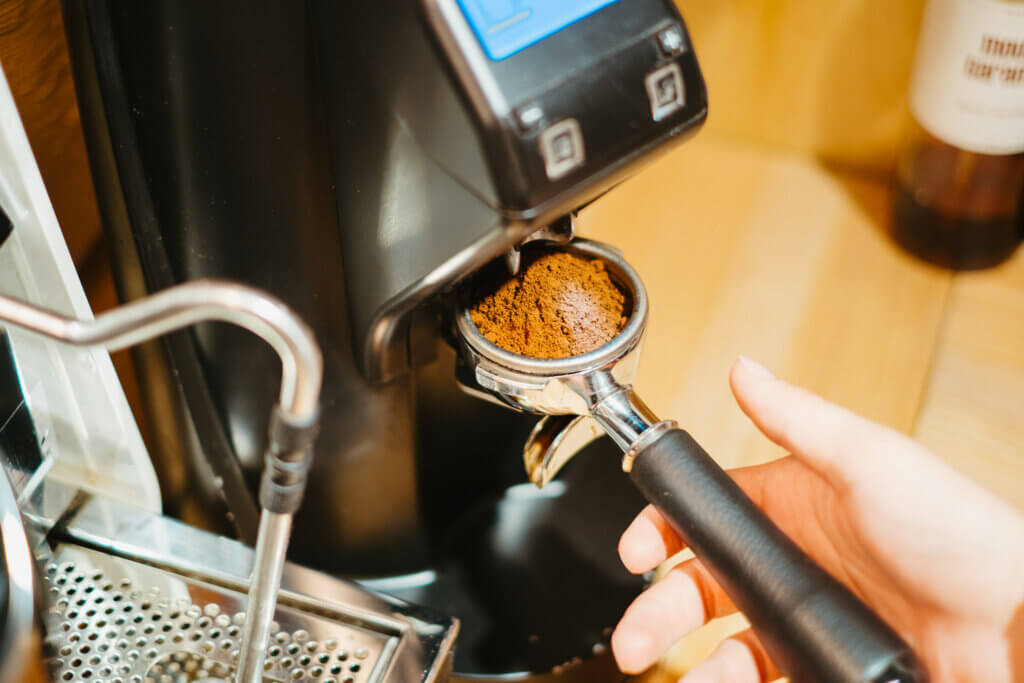
It is best to grind your own coffee, just before brewing, with a burr grinder. Blade grinders are best avoided: they cut the beans into very uneven pieces. Large particles give up less flavour, fine dust gives it up faster and adds more sediment, and it all ends up in the same mug.
No grinder? Ask your roastery to grind it for pour-over. In a sealed, original bag, it will hold a decent flavour for roughly two weeks. That is an estimate, not a guarantee: it depends on the type of packaging, how much air is inside, and how often you open it. Do not decant it into a clear glass jar.
Which coffee to use for brewing in a glass
Without a filter or pressure, the beans are responsible for almost all the flavour. It is the one thing that is genuinely not worth cutting corners on.
This method works well with:
- Medium roast. It is the most forgiving, and gives you sweetness and body. That does not mean light roasts do not work in a glass. They do, they just want a higher temperature, a finer grind, or a longer brew.
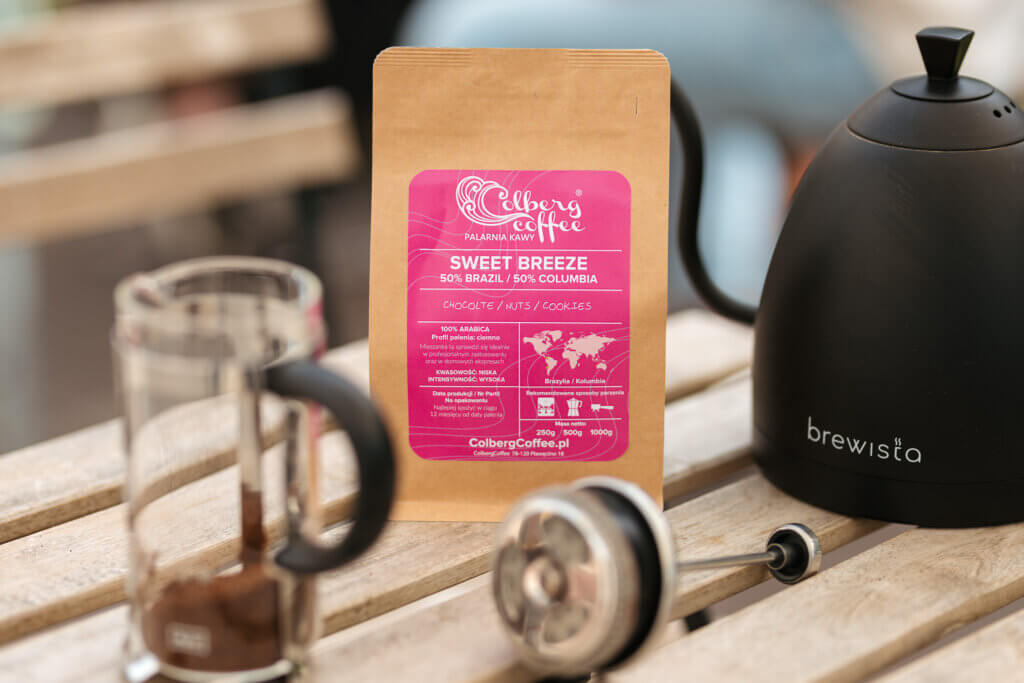
- Low acidity. Brazil is the classic starting point, since a lot of coffee from there has chocolate and nut notes and mild acidity. That is not true of every Brazilian coffee, but you will hit more often than you miss. Coffees from India and Peru work well too.
- Freshness measured in weeks, not months. Look for the roast date on the bag, not just the best-before date. For whole bean coffee in decent packaging, a sensible window is usually about a week to two months after roasting, depending on the roast level. For pre-ground coffee, that window is much shorter.
- Whole bean, not ground. Ground coffee loses its aroma faster than any other form, and a supermarket bag may well have been ground six months earlier.
If you are just starting out, go for a Brazilian. It is sweet, mild and very hard to ruin, even in a glass. You will find our full range in the whole bean coffee category.
Pre-infusion: worth it, or just a fad?
Pre-infusion, also known as blooming, means pouring a small amount of water over the coffee before the main brew and waiting about 30 seconds. It is standard practice with pour-over. In a glass, things look a little different.
Freshly roasted coffee contains carbon dioxide, which is released on contact with hot water. You will see it straight away: the coffee will swell up and start bubbling. Pre-infusion lets some of that gas escape before you add the rest of the water.
To be fair: the benefit is smaller with full immersion than with pour-over. In a glass, you are pouring over all the coffee anyway and stirring it once, so the grounds wet evenly regardless. Even with pour-over, the scientific case for this step is weaker than its popularity would suggest.
As a free freshness test, though, pre-infusion works without reservation. The fresher the coffee, the more it swells. With coffee that is half a year old, you will barely see anything happen. That tells you everything you need to know.
How to drink Polish-style coffee without grounds in your teeth
Grounds in the last sip are the most common complaint about this method. You can cut them down with four tricks, all of them free.
- A coarser grind. Larger particles settle faster and stay on the bottom. Fine dust stays suspended throughout the liquid. This is the change that makes the biggest difference.
- Skimming the top. After 4 minutes, stir once, wait a moment, then scoop off whatever is floating on the surface with a spoon.
- Do not stir before drinking. Every stir kicks sediment back up off the bottom. One stir during brewing is enough.
- Leave the last centimetre. The simplest trick of all, and one that has been used for generations.
There is one more thing nobody mentions: drink slowly. Quick, deep sips pull sediment up off the bottom along with the brew.
If the grounds bother you enough to spoil the whole thing, switch to a method with a paper filter instead, a dripper or a Chemex, for example. They cost a few dozen zloty in Poland and solve the problem at the root.
Polish-style coffee with milk
You can drink it this way, but it helps to know when milk actually helps and when it just papers over the flavour.
Milk softens astringency and adds sweetness. That means it can rescue an over-brewed coffee or one made with average beans. At the same time, it covers up everything you are actually paying for in good coffee: acidity, fruit notes and clarity.
If you drink it with milk, keep two things in mind. First, add the milk only after skimming the grounds off the top: once the drink turns white, you simply will not see them anymore. Second, try increasing the coffee dose by 2-3 g so the drink does not turn bland. The exact amount depends on how much milk you add and how strong you like your coffee.
Cold milk straight from the fridge will drop the coffee’s temperature by a dozen degrees or more. If you like it hot, warm the milk beforehand or use less of it.
Is coffee brewed in a glass good for you?
I have to be honest here. This is the one real downside of this method that rarely gets talked about.
Coffee beans contain two fatty compounds: cafestol and kahweol. A paper filter traps most of them, though not all. In unfiltered coffee, which includes coffee brewed in a glass, Turkish coffee and French press coffee, these compounds end up in your cup.
A 2025 study from Uppsala University shows the scale of the difference. A sample of boiled coffee contained around 939 mg of cafestol per litre. Once that same coffee was poured through a cloth filter, the figure dropped to around 28 mg per litre. For coffee brewed through a paper filter, the median was 11.5 mg per litre, with results ranging from 4.2 to 23.8 mg. So we are talking about a difference measured in tens of times over.
An important caveat, so this does not sound scarier than it is: coffee brewed in a glass is not the same as boiled coffee. You are not boiling it, and the contact time is minutes, not quarter-hours, so the concentration will usually be lower than in that sample. Nobody has measured it precisely, though. What we do know is that no paper filter means noticeably more cafestol than you would get from pour-over.
This matters because cafestol raises LDL cholesterol. Drinking unfiltered coffee regularly can push that level up, and the effect gets stronger the more you drink. How big it is, though, depends on the specific drink, the dose and the individual. Using a model, the Uppsala researchers estimated that swapping three cups a day from the workplace coffee machines they studied for paper-filtered coffee could lower LDL by around 0.58 mmol per litre. That is a calculation, not a measurement, and the authors themselves note that the figure may be overstated and needs confirming.
What does that mean in practice? At one or two coffees a day, the scale of this is completely different from five. If your LDL is already raised, or you drink a lot of unfiltered coffee, consider switching to a method with a paper filter, a Chemex for example. Talk the actual decision through with your doctor: that is not something a coffee article can settle.
Five mistakes that ruin Polish-style coffee
You can fix every one of them today, without spending a penny.
- Boiling water straight from the kettle. Wait 2 minutes. With fine, dark roast coffee, this single change has the biggest impact on flavour.
- Coffee ground too fine. For a glass, you want a pour-over grind, not a moka pot grind.
- Too little coffee. People use 5 g for 250 ml and then wonder why the drink is watery and bitter at the same time.
- Stirring before every sip. You keep kicking up sediment from the bottom and drinking grounds the whole way through.
- Leaving the coffee for an hour. The grounds keep working while the brew cools. After an hour, it is a different drink from the one you made.
If you fix all five and the coffee still does not taste right, the problem is almost certainly the beans. No technique can save coffee that was ground six months ago.
In summary: Polish-style coffee in five sentences
Grind the coffee medium-coarse, like for pour-over. Measure 15 g for a 250 ml mug, ideally after checking it once on scales. Boil the water and wait about 2 minutes for the temperature to drop to around 90-95°C. Pour it over the coffee, wait 4 minutes, stir once and skim the grounds off the top. Drink it within about fifteen minutes, because this coffee does not like being left to sit.
That is it. Polish-style coffee is not a worse method. It is simply a method with no safety net: everything you get right shows up in the cup, and so does everything you get wrong. If you want to take it a step further, find out how to actually brew espresso or how to make cold brew.
Frequently asked questions about coffee brewed in a glass
Should you pour boiling water over ground coffee?
Better not to. Boil the water and wait about 2 minutes, until it drops to roughly 90-95°C. Higher temperatures speed up extraction, and since the coffee sits in the water for several minutes in a glass, boiling water easily tips a fine grind and darker roast towards bitterness. With a light roast and a coarser grind, though, it can work well.
How many teaspoons of coffee per glass?
The starting point is 1 g of coffee for every 16-17 ml of water. That is around 12 g for a 200 ml glass, or 15 g for a 250 ml mug. A heaped teaspoon of ground coffee weighs about 3 g, so you need roughly 4 teaspoons for a glass and 5 for a mug. That is more than most people use, which is exactly why the coffee ends up watery. Grind size and roast level shift the number slightly too. Your best bet is to measure it once on scales and remember what that looks like in your own teaspoon.
How long should you brew ground coffee?
About 4 minutes from pouring, then stir once and skim the foam and grounds off the top. Brewing for longer only raises extraction slightly, while making bitterness easier to draw out. Adjust strength with the dose, not the time. Also remember that the grounds stay in the vessel and keep working, so it is best to drink the coffee within about fifteen minutes.
How do you brew coffee in a glass without grounds in it?
Grind coarser, since larger particles settle to the bottom faster. After 4 minutes, stir once and scoop whatever is floating on the surface off with a spoon. Do not stir before every sip, and drink slowly, since quick sips pull sediment up from the bottom. Leave the last centimetre in the vessel. If grounds are still a problem, switch to a dripper or a Chemex.
Which coffee is best for brewing in a glass?
Whole bean, medium roast, mild acidity, and ground medium-coarse, like for pour-over, just before brewing. Brazil is the classic starting point, since a lot of coffee from there gives you sweetness and chocolate and nut notes, and it is forgiving of mistakes. Look for the roast date on the bag and aim for coffee that is one week to around two months past roasting.
Is coffee brewed in a glass good for you?
It has one downside: no filter. A paper filter traps most of the cafestol, a compound that raises LDL cholesterol. In a 2025 Uppsala University study, a sample of boiled coffee contained around 939 mg of cafestol per litre, while paper-filtered coffee had a median of 11.5 mg. Coffee brewed in a glass is not boiled, so it likely falls somewhere in between, but higher than filter coffee. If your LDL is raised or you drink a lot of it, it is worth considering a paper-filter method and discussing it with your doctor.
